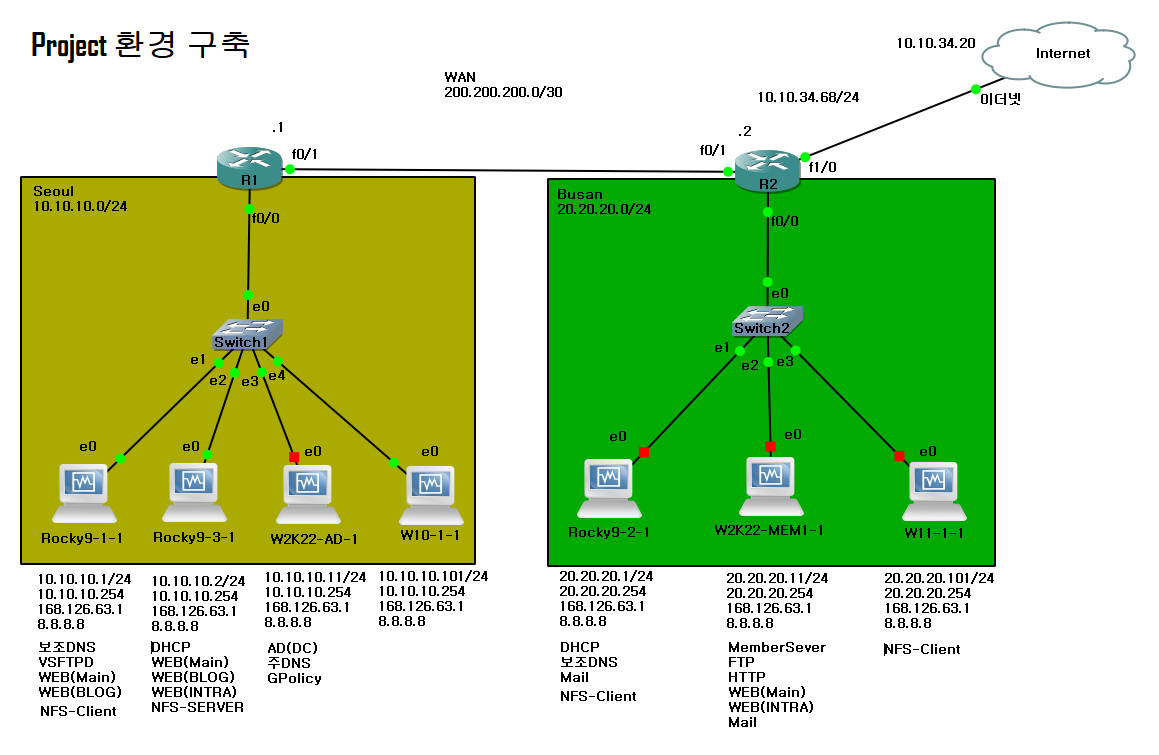
1. 구성도
2. 리눅스 DB 서버 구축 : Rocky9-3-1
2.1. 설치 : dnf install mysql-server
2.2. 서비스 구동 : systemctl start mysqld
2.3. 서비스 구동 상태 확인 : ss -nat
2.4. Mysql 설정
step1) 접속 : mysql -uroot
step2) 사용자 및 접속 허용 호스트 확인 : select user,host from mysql.user;
step3) 사용자 계정, 접속 허용 호스트 (모두), 비밀번호 생성 : create user root@'%' identified by "It12345!";
step4) 사용 가능한 모든 권한 부여 : grant all privileges on *.* to root@'%';
step5) 사용자 및 접속 허용 호스트 확인 : select user,host from mysql.user;
step6) 종료 : exit

2.5. 방화벽 설정
step1) 포트 개방 : firewall-cmd --permanent --add-port=3306/tcp
step2) 설정 저장 : firewall-cmd --reload
3. 리눅스 DB 클라이언트 구축 : Rocky9-1-1
3.1. 설치 : dnf install -y mysql
3.2. mysql 접속 : mysql -uroot -pIt12345! -h 10.10.10.2
3.3. wget, tar 설치 : dnf install -y wget tar
3.4. 워드프레스 설치 : wget https://ko.wordpress.org/wordpress-5.8.8-ko_KR.tar.gz
3.5. 압축 풀기 : tar xvfz wordpress-5.8.8-ko_KR.tar.gz
3.6. http 설치 : dnf install -y httpd
3.7. httpd.conf 파일 수정 : sed -i 's/DirectoryIndex index.html/DirectoryIndex index.php/g' /etc/httpd/conf/httpd.conf
3.8. 워드프레스 파일 복사 : cp -ar wordpress/* /var/www/html/
3.9. php 설치 : dnf install -y php php-cli php-gd php-opcache php-curl php-mysqlnd
3.10. wp-config-sample.php 파일 복사 : cp /var/www/html/{wp-config-sample.php,wp-config.php}
3.11. wp-config.php 파일 수정
step1) sed -i 's/database_name_here/wordpress/g' /var/www/html/wp-config.php
step2) sed -i 's/username_here/root/g' /var/www/html/wp-config.php
step3) sed -i 's/password_here/It12345!/g' /var/www/html/wp-config.php
step4) sed -i 's/localhost/10.10.10.2/g' /var/www/html/wp-config.php
3.12. http 서비스 구동 : systemctl start httpd
3.13. 방화벽 설정
step1) 80번 포트 개방 : firewall-cmd --permanent --add-port=80/tcp
step2) 저장 : firewall-cmd --reload
4. 워드프레스 DB연동 확인 : W10-1
4.1. 브라우저 접속 : 10.10.10.1
4.2. 정보 입력 및 워드 프레스 설치

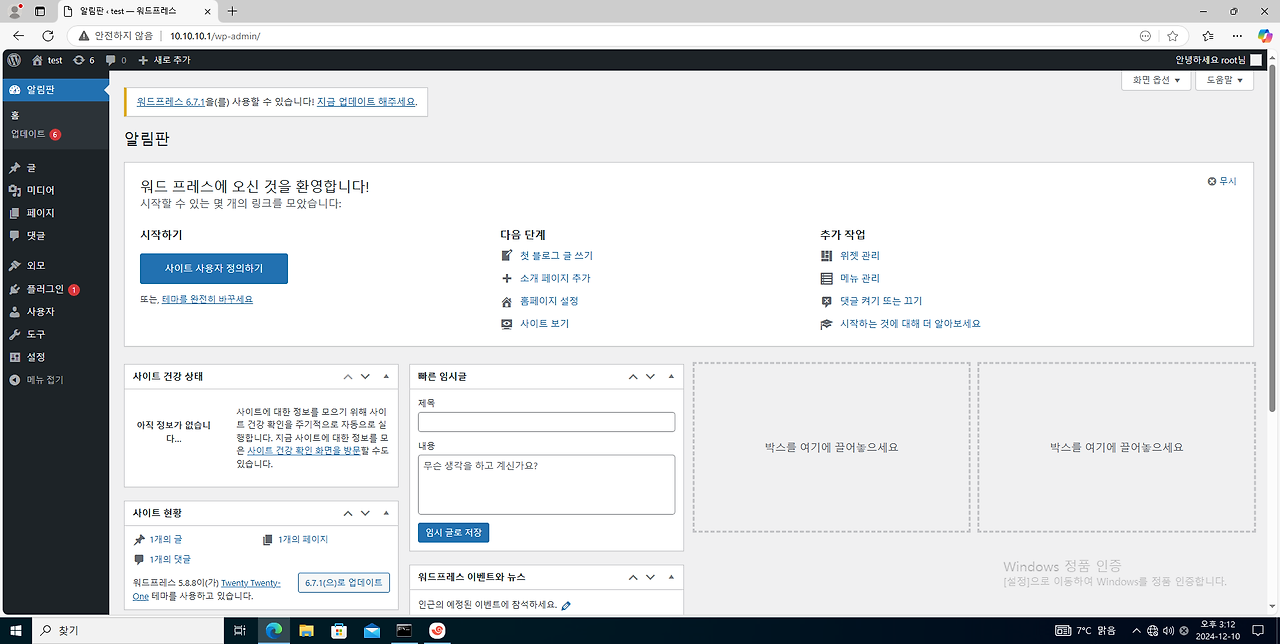
4.3. 로그인

4.4. 로그인 성공
'가상화' 카테고리의 다른 글
| 베스천 호스트 구성 (RSA 비대칭키 활용) (0) | 2024.12.16 |
|---|---|
| WEB 서버 로드밸런싱 (0) | 2024.12.10 |
| 7. NFS 서비스 구축 (윈도우, 리눅스) (0) | 2024.12.10 |
| 6. Mail 서비스 구축 (윈도우, 리눅스) (0) | 2024.12.10 |
| 5. WEB 서비스 구축 (윈도우, 리눅스) (2) | 2024.12.10 |